Showing posts with label kitchen remodel. Show all posts

Tuesday, July 17, 2012

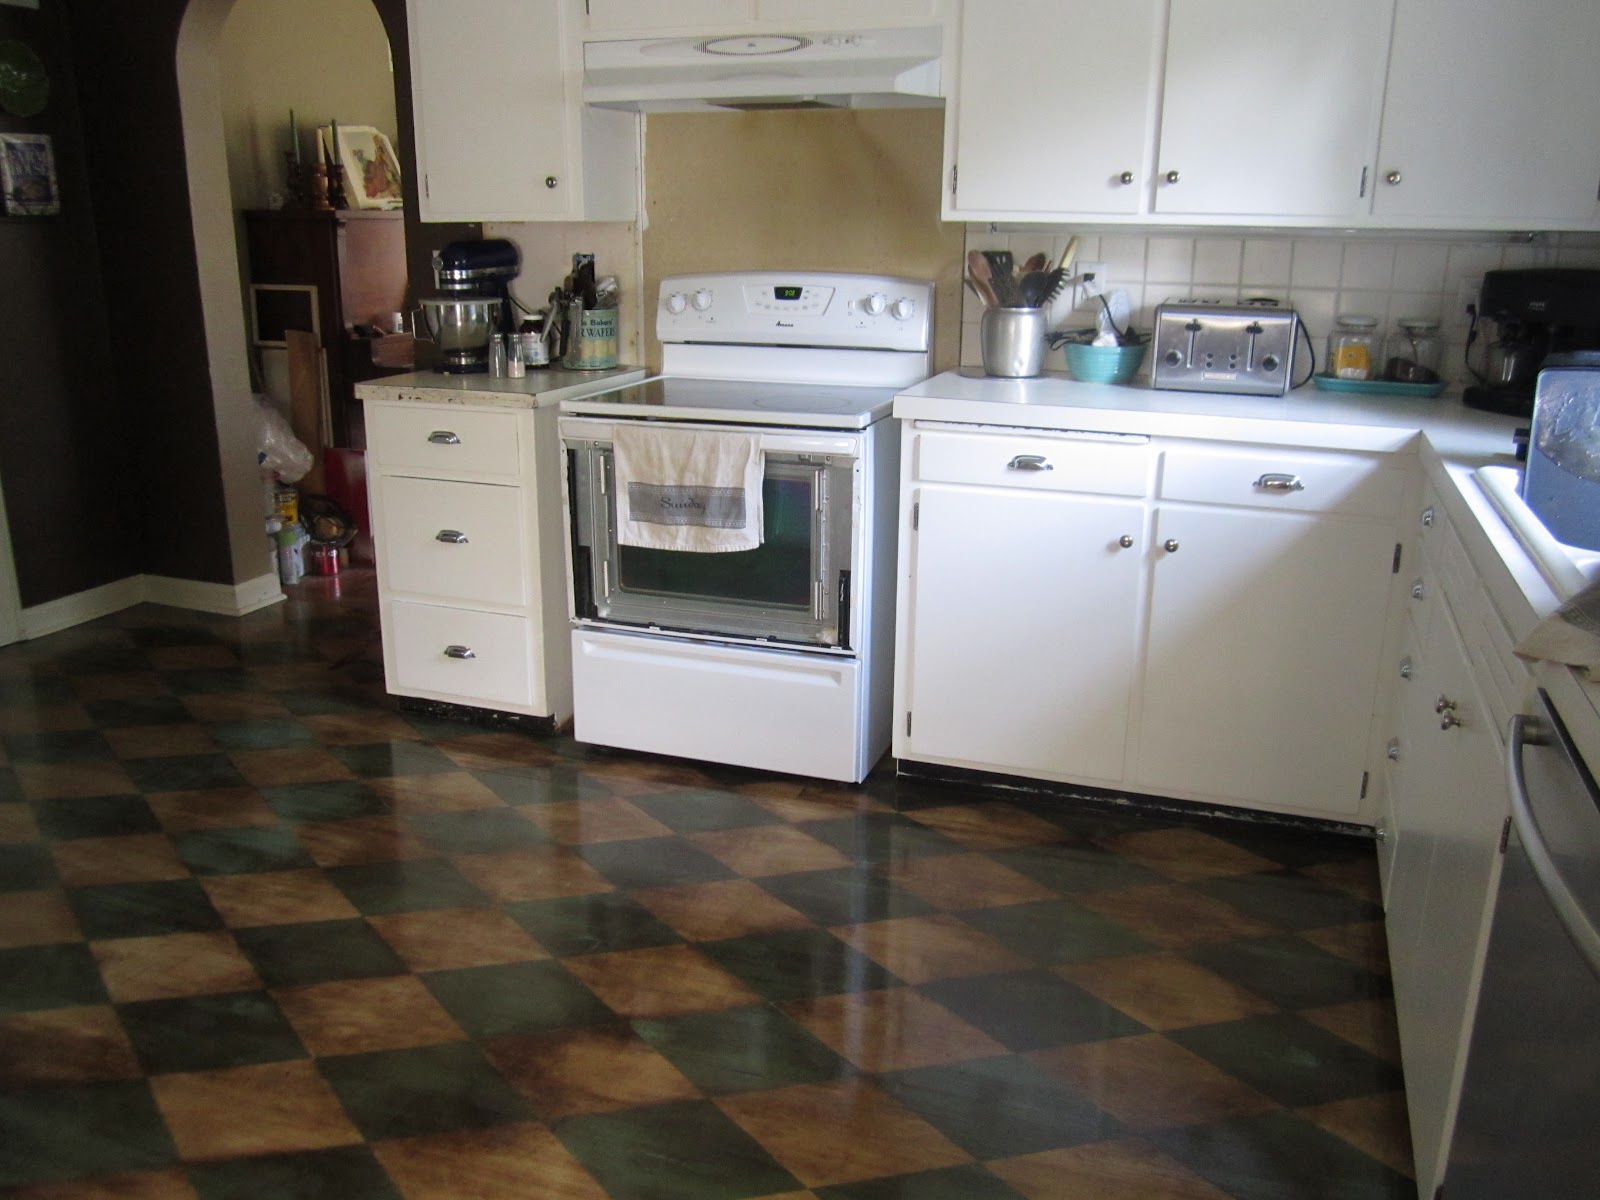
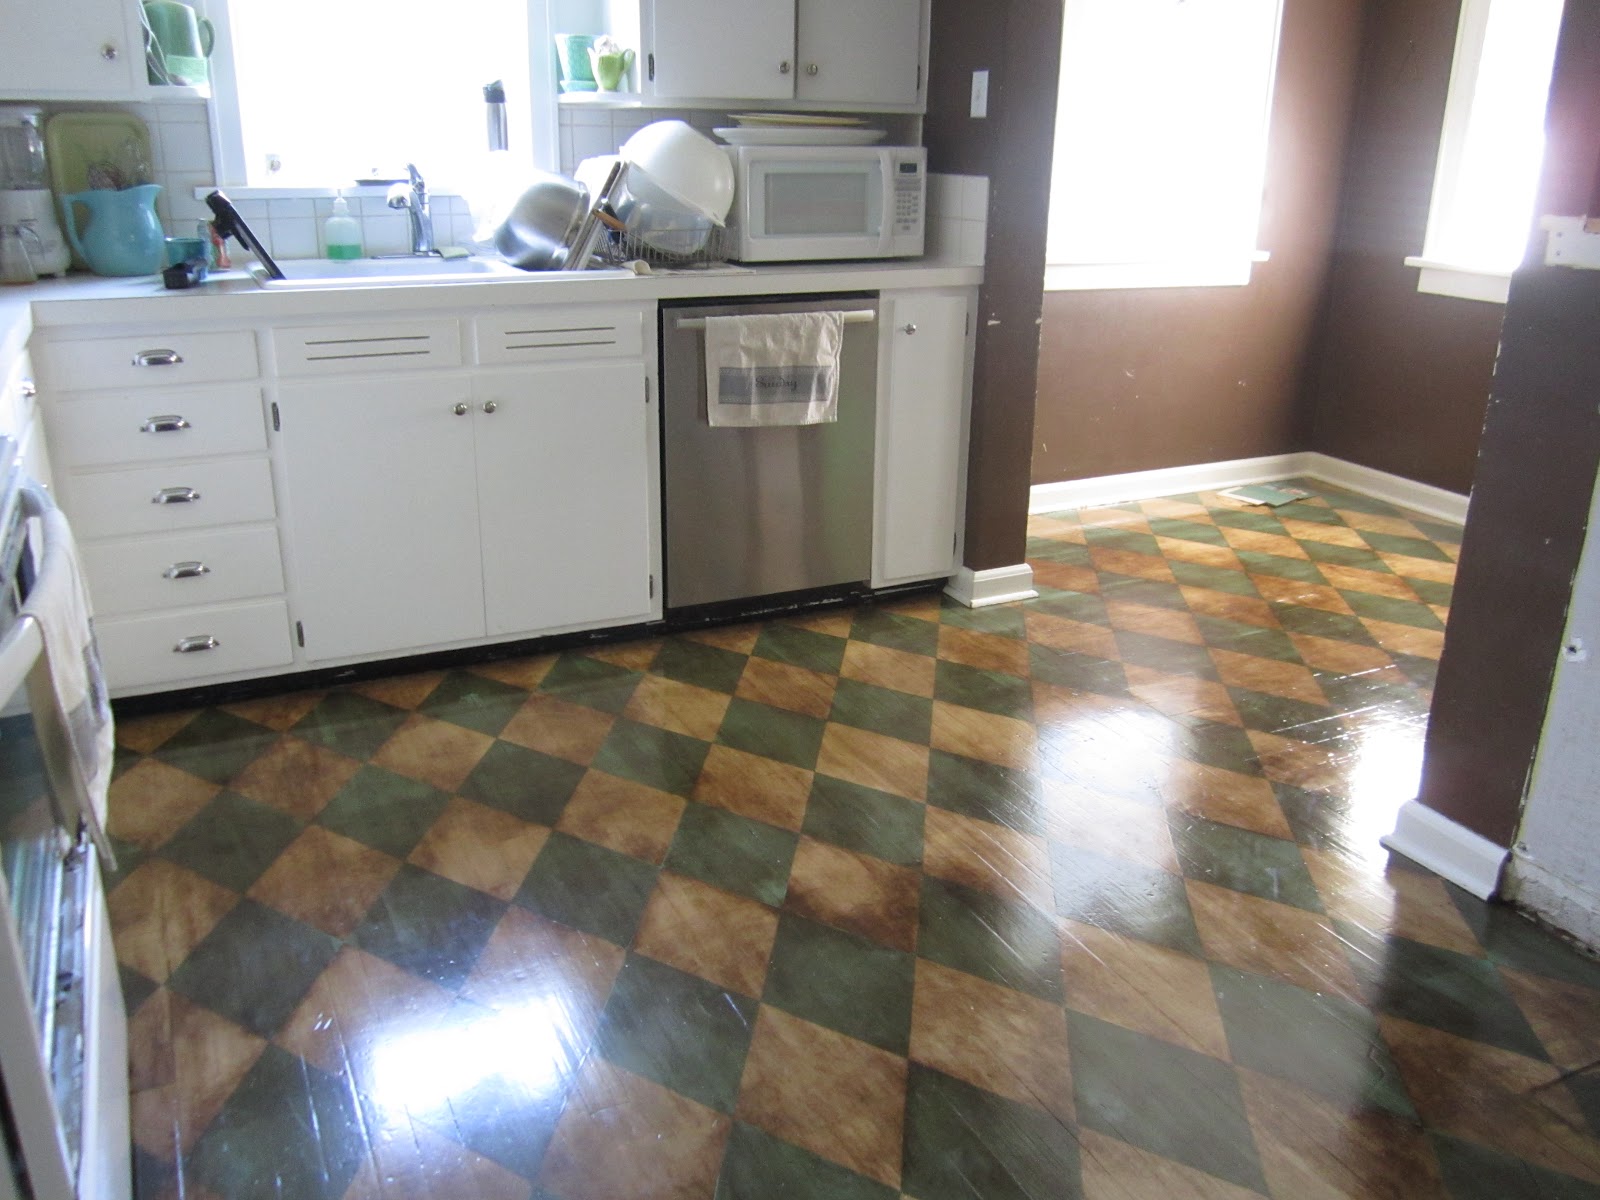
The Floor is Done!!!!!

I have decided to share my floor project on DIY blog link party.  See older post for the progress/process or use the "kitchen remodel" label.

As you can see, I need to replace the glass on the stove front and fill in the tile backsplash.  We're getting to that!
this shot taken from the nook (above)

taken from the doorway

from the half bath


Abi is glad I'm done.  I am too.


another from the bathroom

a close up of some of the more dramatic results.  I really like this spot.  It turned out great and it is soooo washable!

Tuesday, July 10, 2012

Painting the contrasting color......

If you look really hard you can see penciled lines.  I made a template of a diamond shape and traced it over and over.  I started down the center using one of the seams in the wood and worked out from there.

I was using painters tape at first but it took way too much time.  The corners had to be cut exact with a razor blade.  So I abandoned that and just free handed the green painted diamonds.

More green diamonds!  Looking pretty cool at this point.  I think I quit for the day at this point.  These green diamonds took me three days.  Hard on the legs and back.
By now I was curious about how the glaze would look so I tried some in the corner.  People said it looked like "smeered mud", "spilled coffee" and "chocolate milk".

Almost done with the green.  I still had to save the bath, pantry and a little bit more for another day.  It was just that exhausting!

A big sigh of relief after all the green was done.

The Process of Painting a Floor! BEFORE/and then PRIMER

Here is before I really got started.  The fridge had been removed.  You can see on the floor where an island used to be.  We removed that two springs ago!  The stove was also there, explaining the greesy streaks running down the wall.

There is a half bath right off the kitchen and all the floor is the same.  I also painted this, so the toilet had to be removed too.

This is the eat in nook part of the kitchen.  You can see here just how bad the floor really is.  Something needed done!

Shooting from the half bath this is after the first primer coat.

Now from the nook, you can see where the stove belongs.  Also where the fridge was-two springs ago!


Tuesday, July 3, 2012

Fast Forward on the Floor!

I can't find all my pictures at the moment, so I'll post what the floor looks like now.  I'll have to do some before/and afters after I find them.  This picture shows the design painted and then the gel stain/glaze.  I still


need to top coat......about 4 or 5 times.  The green took me 3 days, which was way longer than I expected!  It was brutal being down on the floor like that.  I started out using tape which had to be razor cut for each corner.  Then it was peeling up the paint.  So I went to just free handing after I drew the lines with pencil.


Thursday, June 28, 2012

Next step on the floor

I believe all these pictures are after the first coat of a slightly beige tinted primer base.  It's really almost white.  After these pictures a second coat was done and tonight I will work on putting on the lines for the diamond pattern.   


Ultimately, we will have green and white diamonds with a walnut stain glaze overtop.  You should be able to see all the lines pronounced by the stain.  Maybe some distressing, we'll have to see.  Stay tuned!

Wednesday, June 27, 2012

Painting the Kitchen Floor, Finally!

I thought I'd never find the time to get this done.  But.....Husband and kids, except the big one, are at military camp.  So the house is almost empty and there's no one to cook for, for the most part.  This equals the perfect opportunity and possibly my ONLY opportunity.  I wasn't scheduled to work either.  Small miracle, I tell ya!

.
At this point my back and legs are killing me and the dog was really wondering why he couldn't wander the house like always.  Above I'm standing in the kitchen nook looking toward where the stove should be.


You can see the very warn path and where the stove used to be back a year and half ago.  Things just take me too long!  The fridge goes there now. 


Proof that we are still eating well, whatever we can grill.  If you can't tell, this is shrimp, yellow and orange peppers and stuffed jalapenos.  We had it with alvacado and tortillas.


Another before shot.  Looks like this was the scrub and patch mode!  More tomorrow!


Tuesday, July 26, 2011

the kitchen is finished, sort of

way "before" with the old stove and almost everything removed

NOW, the cabinets are done!

another "before" angle after we did the stove swap and installed the hood vent

NOW

we need to get a new glass front for the stove

the tile needs finished.  the good news is, we found around 50 pieces of leftover.  It shouldn't be a problem. (very good news, indeed)

the floor needs some help, still trying to decide what we'll do about that!  sand?  or just cover it up?

and the ceiling needs some more "fixing" before fresh paint
SO THERE YOU HAVE THE PROGRESS

Tuesday, July 19, 2011

the kitchen: NO, I'm not done yet!

Believe me, it IS coming along.  It's only been about 2 months or so....

this is the last progress photo

from another angle.....looking much better, only 5 lower doors left!

here's another shot of the last stage.  Stay tuned, those last 5 doors are on the dining room table awaiting their final coat of paint.   I'm going to do that just as SOON as dinner is under way.

Thursday, July 7, 2011

back to the kitchen: The great stove switch that went all bad!

It has been at least three weeks since I took off (well ok, gave the order for one of the boys to remove) all the kitchen doors.  I have worked on them at least every other day.  I had a full week straight right off the bat, so that really helped get me going.
Above you can see the old stove was still in and there are no handles on the drawers.  They were sanded and painted several times.  They went from stacks on the floor, then back in several times.  I don't think they have been fully closed most of the last three weeks.  You can see some can lights which were not there before.

Here is the "new" stove and the drawers in place all done with the pulls back on!  wow.  I was getting sick of grasping the bottom half inch of the drawer to get it open.  This stove is looking much better than the other one.  The other on was a built in and since the fridge was in the place it is actually too wide.  If you look really close........

you can see that the outer glass is missing!  It fell over in the truck and shattered.  But, we found out that the cost will be minor and the stove is usable the way it is.  A little worse than spilled milk, but......it is what it is.


still working on the ceiling.  We had a leak a few years back and we also changed the lights to cans.
I finished putting all the doors that were done on this morning.  The hood vent is now in, didn't have one of those before.  So, today I carry on with finishing however many doors I can.  I tried satin finish for the final coat, but it was way too flat and not very washable, so I had to get yet another bucket of paint!  Hopefully it will be all back together next week.

Thursday, April 21, 2011

You should sit down for this.

We've lived in this house for nearly 13 years.  We once had a green stove.  This high dollar stainless one snagged from the scratch n' dent section was a real upgrade.  But, the idea we have toyed with for all these years is unfolding................

The fridge and stove are trading places.  This island has made it difficult for more than one person to manuever around this kitchen.  The downdraft vent has been less than ideal, though better than none at all.  The lights hanging above had to be degreased often, or look at them greasy.

The fridge is in there pretty tight and has only come out probably twice in all these years.

ew.

double ew.

The black strip on the floor is what's left of some ancient linoleum. 

Over the years there's been light efforts of improvement, like paint and knobs.

But this idea was too big to come out until now.

This is to the left of where the fridge was.

We are removing part of this long cupboard to receive the drawer stack that was by the stove.  (the one making  it very hard to move around in the kitchen)

Getting closer.....shrinking it back after we decided it looked way too funny being deeper than everything else.

Mr. Handy wasn't intimidated in the least.

Getting it all put back together now.  Yes, we continued to use the kitchen in this condition!  Coming up will be can lights everywhere and ceiling repairs.  You can see the little bit of red ceiling peeking out, this was the inside of the cupboard.  Exciting, but messy.  There's stuff everywhere!  Stay tuned, there's more to come.  It might take a few months, but it's already looking so much better.